Memo List Aug

备忘&开坑记录
[2017-08-28 12:17:54]
超零界
【存疑?】
脉冲星就是高速自转的中子星,具有极其稳定的周期性,其稳定度比目前最稳定的氢原子钟还要高1万倍以上,被誉为自然界中最稳定的天文时钟,使之成为人类在宇宙中航行的灯塔。
QQ协议分析
[Achieved]
-
ScienJus/qqbot: 基于SmartQQ(WebQQ)的QQ机器人 / a qq robot based on smartqq(webqq) api
-
ScienJus/smartqq: SmartQQ(WebQQ)的Api ,你可以用它实现自己的QQ 机器人 a qq robot based on smartqq (webqq) api
[2017-08-23 18:11:43]
如何正确的看待国际形势
[2017-08-21 00:37:36]
monad
[2017-08-20 12:21:17]
杂文 历史
Heroes in my heart
[2017-08-17 13:53:06]
radare2
Qus
tutorial
-
Radare 2 in 0x1E minutes – Techorganic – Musings from the brainpan
-
A journey into Radare 2 – Part 1: Simple crackme – Megabeets
Functional square root
FCC
Override Styles in Subsequent CSS
<style>
  .pink-text {
    color: pink;
  }
  .blue-text {
    color: blue;
  }
</style>
<h1 class="pink-text blue-text">Hello World!</h1>
通过用空格分隔多个 class 属性,可对 HTML 元素应用多个 class 属性:
class="class1 class2"
注意:在 HTML 中这些 class 如何排序是无所谓的。
然而,在 <style> 部分中 class 声明的顺序却非常重要,第二个声明总是比第一个具有优先权。因为 .blue-text 是第二个声明,它覆盖了 .pink-text 属性。
Override Class Declarations by Styling ID Attributes
我们刚刚证明了浏览器读取 CSS 的顺序是从上到下,这意味着,在发生冲突时,浏览器会使用最后的 CSS 声明。
但是并非只有这些,还有其他覆盖 CSS 的方法。你还记得 id 属性吗?
让我们来覆盖你的 pink-text 和 blue-text 两个 class,通过为 h1 元素添加 id 并设置 id 的样式,使你的 h1 元素变成 orange(橙色)。
给你的 h1 元素添加名为 orange-text 的 id 属性。记住,id 样式看起来是这样的:
<h1 id="orange-text">
在你的 h1 元素中保留 blue-text 和 pink-text 两个 class。
在你的 style 元素中为你的 orange-text id 创建一个 CSS 声明,就像下面例子中的样子:
##brown-text {
  color: brown;
}
注意:你声明的这个 CSS 在 pink-text类选择器的上面还是下面是无所谓的,因为 id 属性总是具有更高的优先级。
生化-代谢途径
- biochemical-pathways.com/#/map/1
- Human_Metabolism_-_Pathways.jpg (2054×1792)
- Metabolic Pathways Poster
[2017-08-14 22:27:57]
板绘
自从有了板子之后就更想画画了
于是收集一些教程
-
How to start out drawing digital art with no drawing expierence - Quora
-
Digital Painting 101 (1 of 5) intro — Ctrl+Paint - Digital Painting Simplified
-
Are You a Drawing Beginner? Start Here. | The Drawing Website
[2017-08-08 16:58:52]
Atom Haskell lint err
在ghci中可以import的模块,写在文件里就报err
I:\Desktop\Programming\Haskell\Write-Yourself-a-Scheme-in-48h\Setup.hs: 2, 1
Failed to load interface for ‘Text.Parsec’
Use -v to see a list of the files searched for.
I:\Desktop\Programming\Haskell\Write-Yourself-a-Scheme-in-48h\Setup.hs: 3, 1
Failed to load interface for ‘Text.ParserCombinators.Parsec’
Perhaps you meant
  Text.ParserCombinators.ReadPrec (from base-4.9.1.0)
  Text.ParserCombinators.ReadP (from base-4.9.1.0)
Use -v to see a list of the files searched for.
找了半天
ref:
Check 1
PS I:\Desktop\Programming\Haskell\WYaSi48> ghc-mod --version
ghc-mod version 5.7.0.0 compiled by GHC 8.0.2

PS I:\Desktop\Programming\Haskell\WYaSi48> stack ghc -- --version
The Glorious Glasgow Haskell Compilation System, version 8.0.2
pass
Open atom use: stack exec -- atom ./
I:\Desktop\Programming\Haskell\WYaSi48\hello.hs: 5, 1
Failed to load interface for ‘Text.ParserCombinators.Parsec’
Perhaps you meant
  Text.ParserCombinators.ReadPrec (from base-4.9.1.0)
  Text.ParserCombinators.ReadP (from base-4.9.1.0)
Use -v to see a list of the files searched for.
PS I:\Desktop\Programming\Haskell\WYaSi48> ghc-mod debug
Version: ghc-mod-5.7.0.0
Library GHC Version: 8.0.2
System GHC Version: 8.0.2
Root directory: I:\Desktop\Programming\Haskell\WYaSi48
Current directory: I:\Desktop\Programming\Haskell\WYaSi48
GHC Package flags:
-iI:\Desktop\Programming\Haskell\WYaSi48
-iI:\Desktop\Programming\Haskell\WYaSi48 -global-package-db
-user-package-db -Wall
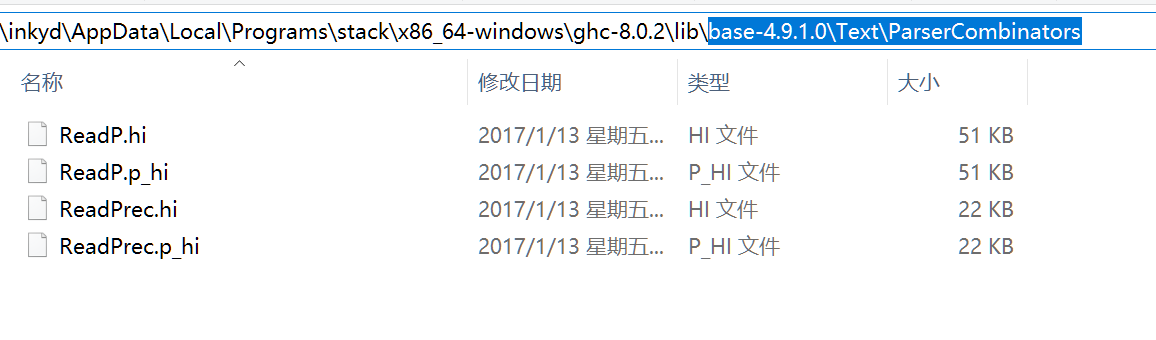
GHC System libraries: C:\Users\inkyd\AppData\Local\Programs\stack\x86_64-windows\ghc-8.0.2\lib
顺手开了 C:\Users\inkyd\AppData\Local\Programs\stack\x86_64-windows\ghc-8.0.2\lib看了下
[2017-08-07 16:38:12]
Atom haskell 开发环境配置
安装二进制插件时使用 stack
stack install ghc-mod
stack install hasktags
FIN
新开一个 stack项目,然后在yaml中添加extra-deps: [parsec-3.1.11]
.cabal中添加
build-depends:       base >= 4.7 && < 5
                   , parsec
报错消失
另: 清除了atom ghc-mod的配置(不做配置,路径留空)
[2017-08-04 08:52:56]
KVM
Kotlin
BIOS 终端向量表
[2017-08-02 20:58:02]
Arch x64 的安装
某up打包的Arch有点问题,遂重装一遍
ref:
- 以官方Wiki的方式安装ArchLinux | viseator's blog 虚拟机中按照教程来,非常流畅,没有任何问题
- ArchLinux安装后的必须配置与图形界面安装教程 | viseator's blog
- ArchLinux你可能需要知道的操作与软件包推荐「持续更新」 | viseator's blog
noto-fonts-cjk安装时建议用无图形的tty
acpi
acpid
使用的是 oh-my-zsh 的 gnzh 主题, 加了一些插件(git zsh-syntax-highlighting),并修改了一下 ~/.oh-my-zsh/themes/gnzh.zsh-theme 文件内 PR_PROMPT 的内容(加了颜文字,然后使用的是 tmux + tmux-powerline
输入法装 ibus + googlepinyin
yaourt -S ibus
yaourt -S ibus-qt
yaourt -S ibus-googlepinyin
ibus-setup
GCC 套装 gcc binutils gdb make patch
网络配置
配置前先ifconfig看看网卡是否启用,若启用
则用ip link set <ethx/enp0sx> down关闭
然后编辑配置文件
sudo cp /etc/netctl/examples/ethernet-static /etc/netctl
vim /etc/netctl
编辑好后,改名<eth-static-enp0sx>
然后启用配置文件netctl start <eth-static-enp0sx>
无输出则配置成功,可ifconfig查看效果,
netctl enable <eth-static-enp0sx>重启再次确认配置生效
Vim 配置
vim 皮肤
ssh vim 皮肤 err
ides#capture_highlight 时发生错误: 第 2 行: E411: 找不到 highlight group: Normal